• Skip to main content
  • Skip to primary sidebar

TelescopeAdviser.com

  • TELESCOPES
  • BINOCULARS
  • ACCESSORIES

teladvadmin

Astro Binoculars Buying Guide

Last updated: September 1, 2017


This might come as a surprise but binoculars are actually one of the best ways to get started in astronomy. They are not simply for daytime viewing. Those bins you use for birding, hunting or watching baseball games could also be used for stargazing. As mentioned in our Telescope Buying Guide, if you’re looking to buy a telescope but your budget is $100 or less, consider binoculars instead. They are your best option and will perform far better than any telescope at that price point.

Like telescopes, binoculars come in a range of types, brands and sizes. This binoculars buying guide covers all of the essentials including descriptions of each specification, what features to look for, explains the advantages and disadvantages of different binoculars and teaches you how to test binoculars before you buy. Take some time to learn about the basics and let us help you find the perfect astro binoculars!

Table of Contents

  • Astro Binoculars
    • Advantages of binoculars over a telescope for astronomy
  • What can you expect to see with astro binoculars?
  • Binoculars Basics
    • Magnification
    • Aperture
    • Field of View
    • Exit Pupil
    • Eye Relief
    • Interpupillary Distance
    • Prisms
      • Porro Prisms
      • Roof Prisms
      • Types of Prism Glass
    • Coatings
    • Focus Systems
  • Comparing Binoculars
  • How to test binoculars before you buy
  • Image-Stabilized Binoculars
  • Mounts
  • What are the best astronomy binoculars for beginners?
  • Budget
  • Recommended Astro Binoculars

Astro Binoculars


While not as powerful as a telescope, astro binoculars provide a wide field of view which allows you to see more of the night sky and makes locating celestial objects easier. You can see more details using both eyes with binoculars than you would using a small telescope with the same aperture. Using both eyes also allows for more natural viewing. Binoculars are simple to use, lightweight, extremely portable and should last a lifetime. Paired with a planisphere or a good book on astronomy, you can definitely become highly skilled at navigating the night sky with binoculars.

You might already own a pair of binoculars but they may not necessarily be ideal for astronomy. Although not all binoculars are suitable for astronomy, astro binoculars can be used in the daytime for bird watching, viewing wildlife, landscapes, landmarks and sporting events.

If you eventually buy a telescope, your binoculars will still see a lot of use as they make a great companion to a telescope. Most experienced astronomers observing with a telescope will also keep astro binoculars close at hand for wide view scans of the night sky and to quickly locate celestial objects.

Advantages of binoculars over a telescope for astronomy

  • lightweight and portable – excellent for travel
  • provide a wide field of view
  • allow for more natural viewing as you can use both of your eyes
  • show more detail than a telescope with the same size objective lens or primary mirror
  • image is correctly oriented – right side up and not flipped
  • can be used for daytime viewing

What can you expect to see with astro binoculars?

It’s important to have realistic expectations. Binoculars are not a substitute for a telescope. There are hundreds of interesting celestial objects that can be viewed with binoculars both in the solar system and beyond. But only a telescope can show planetary details, greater lunar detail, and better views of deep-sky objects.

The moon and planets are bright enough to be unaffected by light pollution. Expect to see fantastic views of the moon including its craters, mountains and maria (large dark spots). Mars will appear as a small red dot. You should be able to see the golden color of Saturn. Unfortunately you will not be able to make out Saturn’s rings as only a proper telescope can provide that amount of detail. However, with high power binoculars on a mount you will see that the shape of Saturn is not round. Experienced users may observe Titan, Saturn’s largest moon. The Galilean moons of Jupiter – Io, Ganymede, Europa and Callisto – will be visible as tiny points of light surrounding Jupiter’s bright disk. You can observe that their relative positions change each night as they orbit the planet. The phases of Mercury and Venus will be visible. Neptune and Uranus will appear as stars. Binoculars are also terrific for viewing comets, asteroids and even man made objects like satellites and the International Space Station.

Viewing deep-sky objects with binoculars will greatly depend on dark skies. The darker the skies, the better the opportunity to see fainter deep-sky objects. In large cities with heavy light pollution, only a few dozen stars may be visible to the naked eye. The number of visible stars increases to a few hundred in the suburbs or a small city. Under dark skies you should be able to see around 2,500 stars with the naked eye. With 10×50 binoculars under dark skies, more than 100,000 stars will be visible. You can expect to see many double stars and most of the 110 Messier objects including open and globular star clusters, nebulae and galaxies like Andromeda.


Binoculars Basics

All binoculars are described using two numbers, e.g. 7×50. The first number represents the magnification or power (7x) while the second number is the aperture measured in millimetres (50mm). These two numbers along with the field of view should be engraved or printed somewhere on the binoculars. Common binoculars for astronomy include 7×35, 7×50 and 8×40 with 10×50 being the most popular.
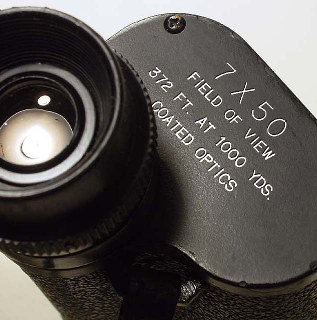
Source: Wikipedia

Magnification

As mentioned above, the first of two numbers used to identify a pair of binoculars indicates its magnification. Binoculars that are 10×50 have 10x magnification, meaning that an object will appear 10 times closer than with the naked eye. A higher magnification will darken the background of the night sky and improve contrast, allowing you to see fainter objects and finer details but reducing your field of view. Generally, the visibility of star clusters, nebulae and galaxies improves with increasing magnification.

For magnifications above 10x, the shakiness becomes amplified making it difficult to hold the binoculars steady by hand. There are some tricks to minimize shaking like sitting in a chair, resting your elbows on a solid surface or leaning against a wall or fence. Large aperture, high power binoculars will require a proper mount.

Avoid ‘zoom’ binoculars with variable magnification (e.g. 10-22×50). They do not provide the precision and optical quality required for astronomy purposes.

Aperture

For binoculars, the aperture is the diameter of each of the objective lenses measured in millimetres. It is the most important specification to look for when buying binoculars. An objective lens with a larger aperture can collect more light providing a brighter and sharper image. The larger the aperture, the more objects you can see including fainter ones.

Aperture doesn’t matter too much for daytime viewing and the front lenses can be smaller as there is plenty of natural light. For night sky viewing, astro binoculars should have an aperture of at least 35mm but preferably around 50mm. Keep in mind that the larger the aperture, the heavier the binoculars will be.

Field of View

The field of view is the width of the area of sky as seen through the binoculars. It is usually described in degrees, in feet at a distance of 1000 yards or in metres at a distance of 1000 metres.

One degree equals 52.5 feet at 1000 yards. If the field of view is given in feet and yards, you can calculate the equivalent field of view in degrees by dividing by 52.5. So a field of view of 420ft/1000yds is equal to 8 degrees (420ft/52.5 = 8). If the field of view is given in metres at a distance of 1000 metres (e.g. 140m/1000m), divide by 17.5 to calculate the field of view in degrees. A field of view of 140m/1000m is equivalent to 8 degrees (140m/17.5 = 8).

Exit Pupil
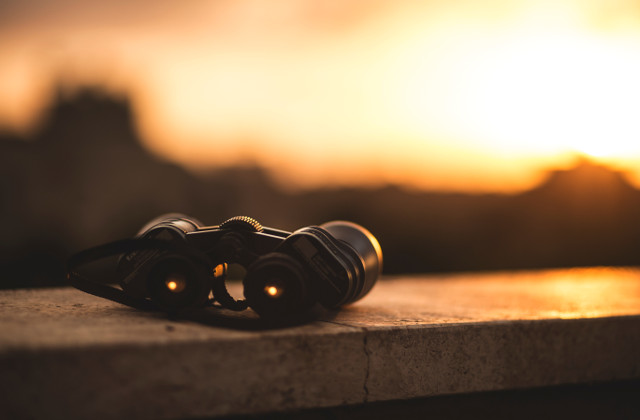

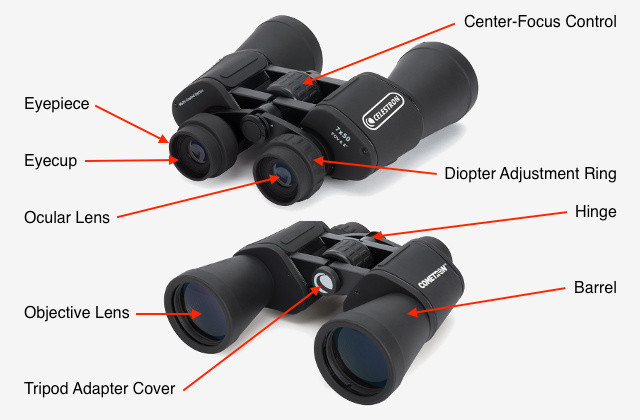
Light enters the binoculars through the objective lenses and exits through the ocular lenses in the eyepieces. If you hold the binoculars out in front of you while pointed towards a light source, you should see a small round disk that appears to be floating behind each eyepiece. The diameter of this disk of light is called the exit pupil. Ideally, the exit pupil should be no larger than the eye’s pupil. The size of the eye pupil can vary widely between individuals and also decreases with age. If the binoculars have an exit pupil larger than your eye’s pupil, that extra light is wasted and you could get away with using smaller aperture binoculars with a smaller exit pupil.

To calculate the exit pupil for a pair of binoculars, divide the aperture by the magnification. For 10×50 binoculars, the exit pupil is 5mm (50mm/10 = 5).

Eye Relief

Eye relief is the distance in millimetres between the eyepiece’s ocular lens and the observer’s eye while still being able to see the entire field of view. Binoculars with a long eye relief can be held further away from your face without reducing the field of view. This is especially important for those who wear eyeglasses as the glasses will force you to hold the binoculars away from your face. An eye relief of at least 15mm is typically necessary for those wearing glasses.

Eyecups that extend from the eyepieces serve two purposes. They block stray light and ensure that the proper eye relief is maintained while the binoculars are held to your face. They are typically made from rubber and either roll up and down, slide up and down or twist up and down. Most eyeglass wearers will use binoculars with the eyecups down.

Interpupillary Distance

Interpupillary distance is the distance between the center of the pupils of the observer’s eyes. The hinge allows binoculars to be adjusted to fit a person’s eye spacing by moving the barrels closer together or farther apart. When the eyepieces are in the correct position relative to your interpupillary distance, the separate images from each eyepiece will combine and the viewing area will appear as a single circle. Children and some women may have an interpupillary distance that is smaller than standard binoculars can accommodate and should try compact binoculars instead.

Prisms

Binoculars come in two styles based on the type of prisms used. Prisms correct the orientation of the image seen through binoculars so that it appears as it would with the naked eye. Without prisms, the image would appear upside down and laterally reversed. Prisms also fold the light path allowing binoculars to be much shorter.

There are two types of prisms used in binoculars:

  1. Porro prisms
  2. Roof prisms
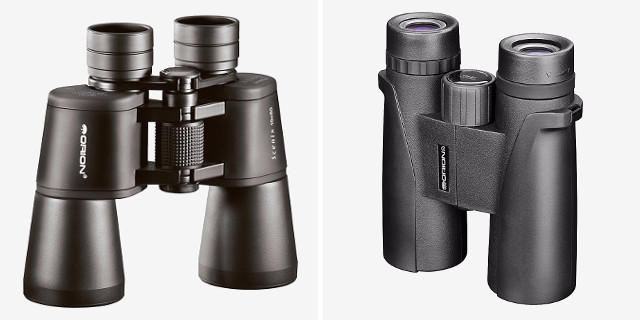
Left: Porro prism binoculars; Right: Roof prism binoculars

Porro Prisms

Binoculars using Porro prisms have a stepped appearance. The eyepieces are close together while the objective lenses are offset and further apart. Porro prism binoculars provide the best value for money as they are cheaper to manufacture and less expensive than roof prism binoculars. The disadvantages are that Porro prism binoculars are larger and heavier than roof prism binoculars and are also more difficult to fully waterproof.

Roof Prisms

Binoculars using roof prisms have a sleek H-like appearance. The eyepieces and the objective lenses are inline with each other. They are smaller and lighter than Porro prism binoculars and also easier to waterproof. The downside is that roof prism binoculars are more expensive, requiring costly precision manufacturing, and special mirror and phase correction prism coatings.

There is no noticeable difference in performance between Porro prisms and roof prisms.

Types of Prism Glass

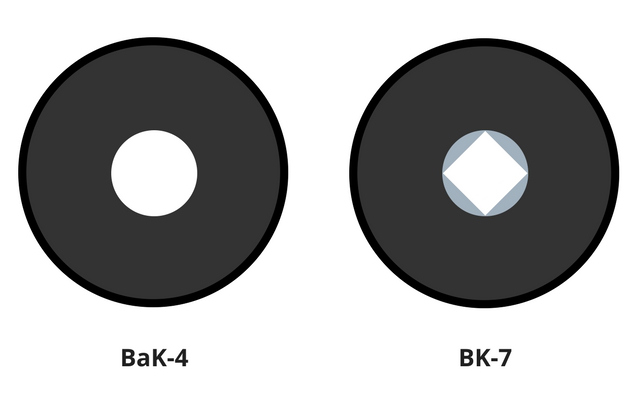
The prisms used in binoculars are made from one of two types of glass: BaK-4 (barium crown glass) or BK-7 (borosilicate crown glass). Look for prisms made from BaK-4 glass as it is of higher quality. BK-7 glass is cheaper and not as good.

To determine the type of prism glass used, hold the binoculars out in front of you pointed towards a light source and look at the exit pupil. If the exit pupil appears perfectly round then the glass is BaK-4. With BK-7 glass, the exit pupil will appear square with grey-blue edges.
Coatings

When light passes through a piece of glass, a percentage of light is reflected and lost. Binoculars have multiple air-to-glass surfaces which means multiple opportunities for light loss. Proper coatings increase the transmission of light through the lenses and reduce the amount of light that is reflected resulting in a brighter and sharper image. There are various terms used to describe binocular coatings including ‘coated’, ‘fully coated’, ‘multi-coated’ and ‘fully multi-coated’. Although there is no standard definition of these terms, they are commonly described as the following:

Coated – at least one air-to-glass surface has a layer of anti-reflective coating.

Fully coated – all air-to-glass surfaces have a layer of anti-reflective coating.

Multi-coated – at least one air-to-glass surface has more than one layer of anti-reflective coating while the other surfaces have one layer of coating or none at all.

Fully multi-coated – all air-to-glass surfaces have more than one layer of anti-reflective coating

The best way to determine the quality of the coatings is to physically inspect the binoculars. Fully multi-coated lenses should indicate higher quality and offer the best performance.

It’s highly unlikely that you will find new binoculars that are not coated. The type of lens coatings should not be a deal breaker. One exception is to avoid binoculars that advertise ‘ruby-coated’ lenses. They are typically found in cheap binoculars and are an indication of low-quality optics.

Focus Systems

There are two main types of focusing mechanisms for binoculars. The most common is the center-focus control which uses a wheel or knob to move both eyepieces back and forth to achieve focus. Most center-focus systems also have a separate diopter adjustment to adjust focus for one eyepiece, typically the right side, independently of the other to compensate for differences in vision between the observer’s two eyes.

The second type of focusing mechanism involves independent focusers for each eyepiece. Focusing each eyepiece is a slower process than using a center-focus control. Binoculars with an independent focus system tend to be more rugged and waterproof. The best quality binoculars will have independent focusing.

For astronomy purposes, celestial objects do not require continual refocusing as their distance does not change.


Comparing Binoculars

There have been several attempts to quantify the relative performance of binoculars with different combinations of magnification and aperture. In our opinion, the best and most realistic rating system used to compare binoculars is the Adler Index. Binoculars ranking higher on the Adler Index will have better performance, all other things remaining equal.

To calculate the Adler Index rating, multiply the magnification by the square root of the aperture. For example, 7×50 binoculars have an Adler Index rating of 49, while 10×42 binoculars have a rating of 65. This indicates that the 10×42 binoculars should outperform the 7x50s.

The table below compares the Adler Index rating of several astro binoculars:

BinocularsAdler Index Rating
7x3541
7x5049
8x4051
8x4252
10x4265
10x5071
15x70126
20x80179
25x70209

The Adler Index is a helpful tool but keep in mind that it’s just a simple calculation. It is no substitute for testing binoculars in person.


How to test binoculars before you buy

If you are buying binoculars in person or inspecting an existing pair of unknown specifications and origin, there are some steps you can follow to evaluate their quality and performance:

1. With a bright light behind you, look at the reflections in the objective lenses. Darker reflections are best and indicate quality lens coatings. Multi-coated lenses will have deep green or purple reflections while white reflections indicate a complete lack of lens coatings.

2. Inspect the surface of each objective lens for scratches and look inside for dust, dirt or fungus.

3. Perform the same tests as above while inspecting the ocular lenses (eyepieces) instead.

4. Hold the binoculars out in front of you pointed towards a light source and look at the exit pupils. You want to see perfectly round and uniformly bright circles of light. Exit pupils with a diamond shape (edges that look cut off) indicate undersized prisms, a cost-cutting measure by the manufacture that will dim the image. Square exit pupils with grey-blue edges indicate full-sized prisms, however the prisms are made from inferior quality BK-7 glass.

5. Check the collimation of the binoculars to ensure that the two barrels are optically aligned. Poor collimation may strain your eyes and cause discomfort. You may see double images if the collimation is really bad. Good quality binoculars should maintain collimation for several decades while some low budget binoculars may lose collimation during shipping.

6. Look out a window or step outside and find a high contrast object like a tree, pole or building against a bright sky. Color fringing along the edges of the object indicates chromatic aberration. A little chromatic aberration is to be expected, however some binoculars will suffer more than others.

7. The image seen through binoculars with a wide field of view may lose sharpness and appear blurry along the edge of the view. This distortion may be worse in some binoculars than others so it’s best to compare multiple binoculars.

8. If you wear glasses, check that the eye relief is long enough for the entire field of view to be visible while wearing your glasses. Make sure the eyecups are not extended.

9. Test the focusing mechanism and diopter adjustment to ensure they are smooth throughout their entire range of motion.

10. Check the hinge by moving the barrels back and forth. Ensure it is smooth throughout its entire range of motion with consistent resistance.

11. Shake the binoculars and listen for rattling or internal noise. Binoculars should not have any loose internal parts.

12. How does the weight of the binoculars feel when held to your face? If your arms tired after a few minutes of holding the binoculars, they are too heavy. Try a lighter pair with a smaller aperture or plan to use a mount.

13. Inspect the rubber eyecups for cracking or splitting.

14. This step is not necessary unless you really want to be thorough. Some binoculars may actually have a smaller aperture than specified due to the internal optics and construction. Your 10×50 binoculars might actually perform as 10x40s. Shine a flashlight through one of the eyepieces and measure the diameter of the disk of light exiting the objective lens projected on a wall or piece of paper.

15. Looking at a bright star in the night sky is the ultimate test of optical performance for astro binoculars. Bring a star to focus in the center of the field of view. While focusing, the star should stay round without any rays extending from it. The star should appear sharp and pointlike. Move the binoculars so that the star is near the edge of the field of view. Is the star still sharp?


Image-Stabilized Binoculars
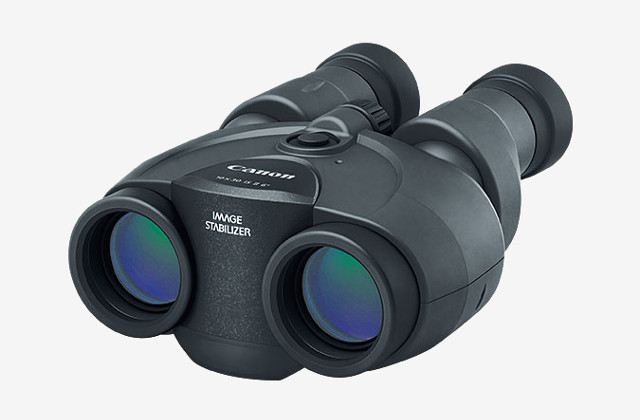
Canon 10×30 IS II Binoculars

The view through image-stabilized binoculars is seriously impressive, especially when experienced for the first time. Push a button and the battery-powered stabilizing mechanisms magically stop the image from shaking. With a perfectly steady image you can take advantage of higher magnifications and smaller apertures with better performance than traditional binoculars. Sounds too good to be true, right? Well, image-stabilized binoculars can be quite expensive. Expect to spend anywhere from $500 to $1500.


Mounts

Holding binoculars steady can be quite challenging. It’s incredibly frustrating to have your target object in view while it’s constantly shaking and jiggling around. You’re just not going to see much. The largest binoculars that most people can comfortably hold by hand while maintaining a steady view are 10×50.

Magnifications higher than 10x will only increase the shakiness and make observing more difficult. Binoculars with apertures larger than 50mm can be quite heavy and uncomfortable to hold longer than a few minutes. If the magnification is higher than 10x and/or the aperture larger than 50mm, consider mounting the binoculars to improve steadiness and give your arms a rest.

A monopod is a very portable and lightweight mount with adjustable height. It consists of a pole that extends from the ground to your eye level and a ball-head which allows the binoculars to be tilted in all directions. Monopods can be used while seated or standing. If the monopod will be used on an angle (not vertical) when seated or slightly reclined, a spiked foot at the base of the monopod can be stuck in the ground to keep it in position.

Using a tripod will provide better stability than a monopod. Binoculars with a tripod adapter can be mounted to most standard photo, video or telescope tripods via an L-bracket. However, some tripod heads may not permit viewing at or near the zenith. Tripods with an adjustable height center post should allow use while standing to view objects overhead. It’s important that the tripod is sturdy and the weight of the binoculars does not exceed the weight capacity of the tripod.

Parallelogram mounts offer the best viewing experience. They are versatile and can be used while sitting, reclined or standing. It’s incredibly easy to adjust the position of the binoculars with the silky smooth 360-degree motions. A counterweight balances the weight of the binoculars which can be raised or lowered while staying fixed on the target object. There are no restrictions to viewing directly overhead. A parallelogram mount can be purchased either with a tripod or separately and attached to an existing tripod.


What are the best astronomy binoculars for beginners?

For beginners wondering what astro binoculars to buy, we recommend 10×50 Porro prism binoculars. They offer a good balance of aperture size, magnification, weight and affordability. The 50mm objective lenses are relatively large and provide enough light gathering ability to see faint objects. Compared to 7×50 binoculars, the increased magnification of 10x50s will make objects appear larger and also darken the background of the night sky which allows easier detection of faint deep-sky objects. Most people should be able to comfortably hold 10×50 binoculars by hand and keep them steady. If you don’t think you will be able to, consider smaller binoculars like 7×50, 8×40 or 8×42.


Budget

A good budget for astro binoculars is between $100 and $300 with plenty of solid options at the lower end. There are functional low budget binoculars, however expect to find cheap build quality, BK-7 glass, poor coatings, collimation issues, and possibly a smaller aperture than advertised. On the other end of the spectrum, some giant binoculars and those with special features like image stabilization can cost upwards of several thousand dollars. For the recommended 10×50 Porro prism binoculars, there are several good quality choices for around $100.
Recommended Astro Binoculars

For Beginners

Low Budget Binoculars

Giant Binoculars

Meade Infinity 102mm AZ Refractor Telescope Review

Last updated: August 7, 2017


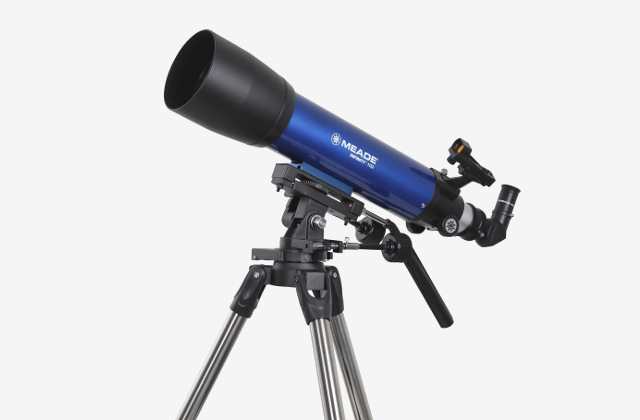
The Meade Infinity 102mm AZ Refractor Telescope is the largest aperture telescope in Meade Instruments’ Infinity line of refractors. It was slightly over budget to be included in our list of best budget telescopes for under $200. If you’re willing to spend the extra money it’s also far superior to the telescopes reviewed in our list of best telescopes for kids. With multiple eyepieces and good quality accessories, the Infinity 102 is the complete package and still offers excellent value for the price. It’s perfectly suitable for a beginner or child as their first telescope and would make a great gift.

Optics

The Infinity 102 has a 4-inch (102mm) aperture objective lens with a focal length of 600mm and a focal ratio of f/5.9. For an entry-level telescope, we were pleasantly surprised by its optical performance. It excels at low power for wide field views. A plastic dew shield fitted to the front end of the optical tube prevents condensation on the objective and blocks stray light. As this is an achromatic refractor with a fast focal ratio, chromatic aberration will be present appearing as color fringing around the edges of brighter objects like the moon. An added bonus is the ability to use the telescope for daytime terrestrial viewing.

Mount

The altazimuth tripod comes fully assembled and is constructed of cast aluminum with stainless steel tube legs. The height is adjustable from 33 to 51 inches. It is fairly sturdy and the legs are well constructed, however like any entry-level telescope on a tripod mount it is prone to vibrations. Expect to see some image wobble looking through the eyepiece when focusing, making altitude and azimuth adjustments or after bumping the telescope. The image should typically stabilize in a second or two. The vibrations are not as bad as other lower budget telescope mounts. To improve stability and reduce vibrations, try adding a 10lb weight to the accessory tray and not fully extending the tripod legs while observing from a chair.

A thumbwheel screw secures the optical tube to the mount through a slotted piece with a rubber tread. The screw can be inserted into either of the two holes in the dovetail attached to the bottom of the optical tube. An angled panhandle is used to make large up and down, and side to side movements. The slow motion control knobs are used to make fine adjustments for both axes to allow precision tracking of celestial objects. There are not many telescopes in this price range that have slow motion controls. The accessory tray can hold 3 eyepieces or 2 eyepieces and the Barlow while you’re observing. It also acts as a brace to stabilize the tripod legs.

There are a few issues with the mount when viewing objects overhead (at or near the zenith). This is fairly common with entry-level mounts and not necessarily a dealbreaker. The azimuth slow motion control makes contact with the optical tube when in the vertical position. If this bothers you or you do a lot of overhead viewing, you could try replacing the slow motion control with a longer shaft control knob. Also the panhandle may interfere with the eyepieces stored in the accessory tray. You may need to play around with the leg height to gain enough clearance.

Finder

The finder is a battery-powered red dot reflex sight that provides no magnification. It has a large viewing window and an adjustable brightness knob. The red dot is used as a guide to position the telescope in the direction of a target celestial object so that it is accurately centered in the telescope eyepiece. Don’t forget to turn off the red dot finder when you’re done or you will find the battery dead next time you want to use it. The finder mount is cast into the focuser and can accept a finderscope if you wish to use one instead.

Eyepieces

The Infinity 102 comes with three decent quality, fully-coated 1.25″ Modified Achromat eyepieces and a 2x Barlow lens. The eyepieces include a 26mm (23x magnification), a 9mm (67x magnification) and a 6.3mm (95x magnification). The 2x Barlow doubles the magnification of each eyepiece to 46x, 133x and 190x respectively. In all you get 6 different powers covering a wide range from low to high magnification which is always nice for beginners. There should be no immediate need to purchase an additional eyepiece.

Star Diagonal

The 90 Degree Erect-Prism Diagonal is an Amici prism design and corrects the image seen in the eyepiece both horizontally and vertically. This makes using star charts much easier as the image on the chart will match the image in the eyepiece. It also means that you will see a correctly oriented image when using the telescope for terrestrial viewing. The 90 degree diagonal also provides a more comfortable viewing angle especially when the telescope is pointed towards the zenith.

Focuser

The rack and pinion focuser is made from metal and well-built for an entry-level telescope. The focuser performs well with smooth focusing. Although described as a 1.25″ focuser, it appears to be a 2″ focuser with a removable 1.25″ adapter. The focuser is capable of fitting a 2″ diagonal which would allow the use of 2″ eyepieces. However, it’s uncertain how the focuser will hold up over time under the extra weight of 2″ eyepieces. Heavier eyepieces could also affect the balance of the optical tube.

Views

What can you expect to see with the Infinity 102? It offers good views of the moon and planets as well as double stars. Expect to see the craters of the moon in good detail,  Jupiter’s cloud bands and its 4 moons, the rings of Saturn and its largest moon, Mars as a red disk, the changing phases of Mercury and Venus, tiny Neptune and Uranus will also be visible and you may see some coloring. It’s not ideal for viewing deep-sky objects but under dark skies and optimal conditions, brighter DSOs will be visible including galaxies, nebulae, and globular and open star clusters.

Carrying Bag

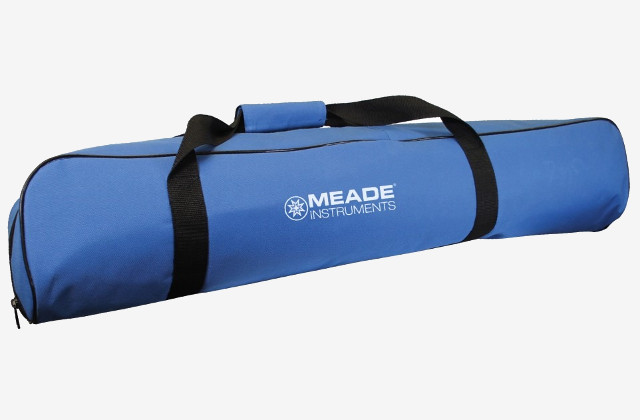
Meade sells a padded carrying bag for the Infinity 102 that can hold the optical tube and tripod mount. It also has a drawstring pouch to store the accessories. The bag can be carried using the hand strap or shoulder strap. While not necessary, the carry bag makes transporting the telescope much easier and gives you peace of mind knowing that the optics will be protected during storage or when taking it in and out of your vehicle. It’s still a very portable telescope even without the bag. The combined weight of the optical tube and mount is just over 12lbs.

Pros and Cons

  • Excellent package for beginners
  • Includes 3 eyepieces
  • Correct image prism diagonal
  • 2x Barlow lens
  • Accessory tray
  • Chromatic aberration
  • Mount prone to vibrations
  • Mount interferes with optical tube when viewing overhead

Buy on Amazon

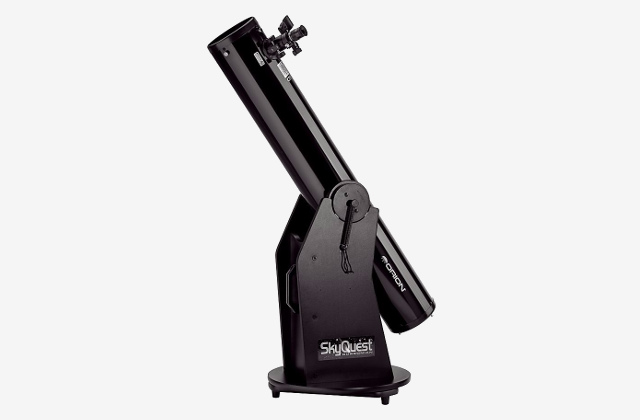
Orion SkyQuest XT6 Classic Dobsonian Telescope Review

Last updated: August 1, 2017


You might have noticed that we’re big fans of Dobsonian telescopes especially for beginners. They’re simple to setup, easy to operate and provide excellent value for the aperture size. The Orion SkyQuest XT6 Classic Dobsonian Telescope is no exception. It’s a very good telescope that is popular with beginners and highly recommended. Priced at[amazon_link asins=’B001DDW9UW’ template=’PriceLink’ store=’telescopeadviser-20′ marketplace=’US’ link_id=’a0bc6b20-760b-11e7-a047-117a7f88ec2f’]the XT6 is over $100 cheaper than the larger XT8 and offers better value and performance than the smaller XT4.5. While we think that 8-inch Dobsonians are the sweet spot for beginners, a 6-inch is the next best thing and a good way to save some money.

Optics

The XT6 is a Newtonian reflector telescope. It is well-built with nice fit and finish for the price and should last a lifetime. The primary mirror has a 6-inch (150mm) aperture with a focal length of 1200mm and a focal ratio of f/8. There is no spherical aberration as the primary mirror is parabolic. Coma will not be as apparent as with the Orion StarBlast 6 Astro Reflector Telescope. The central obstruction from the secondary mirror is only 23 percent and shouldn’t be noticeable. The optical performance is excellent and excels with deep-sky objects.

Mount

The Dobsonian base is a simplified altazimuth mount also known as a rocker box. It’s constructed of wood with three basic Teflon pads for azimuth bearings and UHMW polyethylene pads for the altitude bearings. The motions are smooth and the base is very stable which means no vibrations. The optical tube is secured to the base with a system of heavy-duty tension springs which also keep it balanced.

Finder

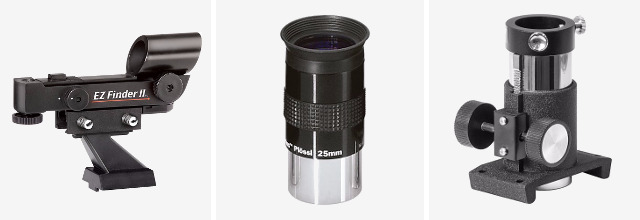
Using the EZ Finder II is pretty simple and straightforward. The EZ Finder II is a battery-powered red dot finder with zero power (no magnification). It helps you locate celestial objects and accurately aim the XT6 in their direction. You can adjust the position of the telescope while looking through the finder’s viewing window until the red dot is aligned with the target object you wish to observe. Then look through the telescope’s eyepiece and the object will be in view. Remember to turn off the EZ finder when not in use to preserve the battery. The majority of people prefer a finderscope that provides magnification instead of a red dot finder. Replacing the red dot finder with a finderscope is an easy upgrade to make at a later time.


Eyepiece

The XT6 comes with a 1.25″ Sirius Plossl 25mm eyepiece. The eyepiece is pretty good quality and provides 48x magnification with a 52° apparent field of view. It’s unfortunate that only a single eyepiece is included. We recommend picking up at least one additional eyepiece like a 6mm eyepiece which would provide 200x magnification and would show plenty of lunar and planetary detail. Be aware that the image shown in the eyepiece will be upside down and flipped 180 degrees. This is normal for reflector telescopes.

Focuser

The focuser is a basic 1.25″ rack and pinion made of plastic and comes with a dust cap. It’s a decent focuser with fairly smooth focusing but there are superior options out there. It’s possible to make a minor modification to improve the smoothness of the focusing. Follow this step-by-step guide to replace the standard thick grease with lithium grease. Switching the focuser for a better one is another easy upgrade you could make in the future.

Collimation

The primary and secondary mirrors will require periodic adjustments called collimation. This is a simple process that aligns the optics to ensure optimal image quality. Collimating a telescope can seem overwhelming at first but trust us, it’s not complicated. The instruction manual includes detailed directions and this video by Orion explains how it’s done. To make collimation easier, the XT6 comes with a simple collimation cap and the primary mirror is center-marked. You will need a Phillips screwdriver that is not included.

Views

With optimal viewing conditions and the right eyepiece, you can expect to see amazing views of the moon and planets including:

  • craters of the moon
  • Jupiter, its 4 moons, cloud bands and Great Red Spot
  • Saturn’s rings, Cassini Division, and largest moon Titan
  • Mars as a red disk
  • Mercury and Venus and their changing phases
  • Neptune and Uranus as tiny colored disks
  • comets

Under dark skies, the 6-inch aperture is large enough to show plenty of deep-sky objects. Expect to see galaxies, nebulae, and globular and open star clusters.

Astrophotography

For astrophotography, it is possible to capture short exposure photos of the moon and planets with the XT6. However, Dobsonian mounts aren’t suited for taking long exposure images of deep-sky objects. They are better for viewing than for photography.

Dimensions

The optical tube has a weight of 13.5lbs and the base weighs 20.9lbs for a combined weight of 34.4lbs. The optical tube is 45.5-inches long and should fit in the back seat of a car. The base has a handle for easier transport. Although the XT6 is slightly lighter than its larger XT8 cousin (less than 7lbs lighter), there isn’t really a difference in portability. The optical tubes are roughly the same length and the bases weigh about the same.

Kit

Orion also offers a kit version of the XT6 for about $30 more that includes a few extras. These extras include a 2x Barlow lens (worth about $40 on its own), a RedBeam mini LED light, a planisphere, Moon Map and Telescope Observer’s Guide book by Richard J. Bartlett. The package is a good value especially if you were planning to buy a Barlow lens. The 2x Barlow would double the magnification of the included 25mm eyepiece to 96x.

Pros and Cons

  • Large aperture
  • Easy to use
  • Excellent for viewing deep-sky objects
  • Better value and performance than XT4.5
  • Includes a collimation cap
  • Only one eyepiece included
  • Need a higher power eyepiece for moon and planets
  • Limited accessories

Buy on Amazon

Orion StarBlast 6 Astro Reflector Telescope Review

Last updated: July 28, 2017


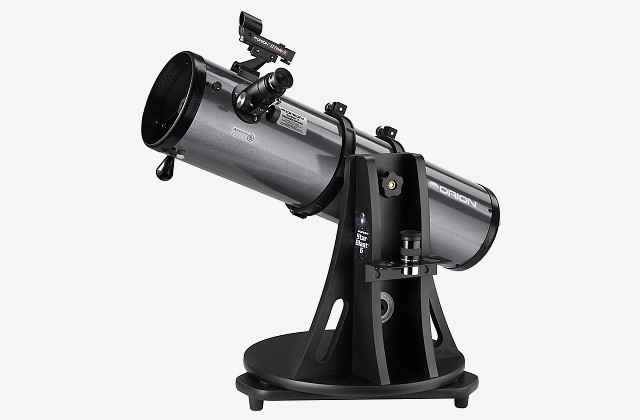
A 6-inch Dobsonian reflector telescope is just too big and awkward for some people. Finding the storage space in your home is another issue. If you’re looking for a large aperture telescope with a compact design, the Orion StarBlast 6 Astro Reflector Telescope is an excellent alternative. It packs a whopping 6-inch (150mm) aperture primary mirror into an optical tube that fits on a tabletop mount. Its ease of use and portability make the StarBlast 6 a great option for beginners and experienced astronomers alike.

Optics

The optical performance of the StarBlast 6 is an improvement over the 130mm tabletop reflectors reviewed in our Best Budget Telescope article.  The seemingly small increase in aperture size to 150mm actually offers 33 percent more light gathering ability resulting in brighter and sharper images. Although the StarBlast 6 does have a large central obstruction compared to longer focal length reflectors with similar sized apertures, the reduction in light due to this obstruction should not be apparent to most people. The parabolic primary mirror has a focal length of 750mm and a focal ratio of f/5. Using a parabolic primary mirror eliminates spherical aberration common with low-budget reflectors that have spherical primary mirrors.

Comatic aberration or coma will be present and is typical of Newtonian reflector telescopes. With coma, stars along the edge of the field of view will have a distorted comet-like tail appearance. Stars in the center of the field of view are unaffected. This will be noticeable at low magnification for the most part.

Value

One downside is that the StarBlast 6 costs about $70 more than a 6-inch Dobsonian like the Orion SkyQuest XT6 Classic Dobsonian Telescope, which is arguably better and has a longer focal length. In fact, for an extra $40 you could buy an 8-inch Dobsonian telescope. But again, if storage and portability are a major concern than the StarBlast 6 is good replacement.

Mount

The tabletop Dobsonian base is a simplified altazimuth mount that comes pre-assembled for quick setup. The mount rotates 360 degrees and moves up and down with smooth motions. An altitude tension knob can adjust the tension of the up and down movement or lock the optical tube in place. A handy eyepiece rack is built into the side of the mount and can hold 3 eyepieces. Two carrying handles allow for easy portability.

The optical tube attaches to the mount with tube rings. The tube rings also allow you to rotate the optical tube to find a preferred eyepiece angle. By adding a dovetail plate to the tube rings, you could attach the optical tube to an altazimuth or equatorial tripod mount. The front end of the optical tube has a knob that acts as a handle to move the telescope in all directions.

The StarBlast 6 is large enough to operate from the ground if you’re mobile enough or comfortable doing so. However, most people will prefer to place the telescope on a sturdy surface like a picnic table, small portable table, stool or crate.

Finder

The EZ Finder II is a red dot reflex sight mounted to the optical tube and used to locate the celestial objects you wish to observe. Unlike a finderscope, the battery-powered red dot finder does not provide any magnification. Looking through the finder’s viewing window you will see a projected red LED dot which is used as a guide to move the telescope until the dot is centered on the target object. Don’t forget to turn off the EZ Finder II when you’re not using it to save battery life.


Eyepieces

The telescope comes with two 1.25″ Sirius Plossl eyepieces – a 25mm (30x magnification) and a 10mm (75x magnification). These are good quality eyepieces to get you started but you will likely want to add an additional shorter focal length eyepiece or a Barlow lens to see more lunar and planetary detail. Adding a 4mm wide-angle eyepiece would give you 188x magnification. A 2x Barlow would double the magnification of the included eyepieces to 60x and 150x.

Focuser

The plastic 1.25″ rack and pinion focuser is perhaps the weak point of the StarBlast 6. It’s decent and does the job but it’s pretty basic. This is something you could upgrade in the future but there is also a slight modification you can do yourself. This archived step-by-step guide details how to remove the standard thick grease and replace it with lithium grease for much smoother focusing.

Collimation

As with all reflector telescopes, collimation (periodic adjustment of the mirrors) will be necessary. This will make sure the mirrors are properly aligned for sharp and crisp images. While collimating a telescope may seem difficult at first, it shouldn’t take longer than a minute or two once you get the hang of it. And the StarBlast 6 has some helpful features to make collimation easier. The primary mirror is center-marked, a simple collimation cap is included and thumbscrews allow you to adjust the primary mirror with just your fingers. You will need a 2mm Allen wrench to adjust the secondary mirror although one is not provided.

Views

The StarBlast 6 is a great telescope for viewing the moon, planets and deep-sky objects. You can expect to see the craters of the moon; Jupiter including its 4 moons, cloud bands and Great Red Spot; Saturn’s rings, Cassini Division, and largest moon; Mars as a red disk; Mercury and Venus and their changing phases; Neptune and Uranus as tiny colored disks. Under dark skies, the 6-inch aperture will show plenty of deep-sky objects including galaxies, nebulae, and globular and open star clusters.

Dimensions

The combined weight of the optical tube and mount is 23.5lbs (about 10lbs heavier than a 5-inch tabletop reflector) with a 28-inch long optical tube. Compare this to the Orion SkyQuest XT6 Classic Dobsonian Telescope which weighs over 10lbs more at 34.4lbs and has a much longer optical tube at 45.5-inches. The StarBlast 6 is too heavy for a child to move and setup on their own. Teenagers and adults should have no problem carrying the optical tube and mount as one assembled unit or as separate pieces.

PushTo Version

Orion also makes a PushTo version of this telescope called the StarBlast 6i IntelliScope for about $160 more. It comes with a computerized object locator that has a database of thousands of objects. A handheld controller provides arrow directions for you to follow to locate and track an object by manually moving the telescope. While this is a nice feature, it’s simply not worth the $500 price tag in our opinion.

Pros and Cons

  • Large aperture
  • Easy to use
  • Portable
  • Excellent for viewing deep-sky objects
  • Eyepiece rack
  • More expensive than 6″ Dobsonian
  • Shorter focal length than 6″ Dobsonian
  • Large obstruction
  • Coma

Buy on Amazon

Best Telescopes for Kids

Last updated: July 17, 2017


Buying a telescope for your child is a bit of a dilemma. If you suspect that their interest in astronomy will vanish in a few weeks, it doesn’t make sense to shell out serious money for a good quality telescope. However, if you buy them a cheap junk telescope that doesn’t show much other than the moon then who can blame them for quickly losing interest and moving on.

In the $50 to $100 price range there are a few low budget, entry-level telescopes that should allow a child to view the moon and some planets. They are not specifically marketed towards children but they are easy to operate and small enough for them to handle on their own.

Table of Contents

  • Look for a used telescope
  • What is the best telescope for kids?
  • What can you expect to see?
  • Best Reflector Telescope For Kids - Orion SkyScanner 100mm Tabletop Reflector Telescope
  • Best Refractor Telescope For Kids - Meade Infinity 70mm Altazimuth Refractor Telescope
  • Best Lower Budget Telescopes For Kids
    • Celestron Cometron FirstScope Telescope
    • Orion FunScope 76mm Tabletop Reflector Telescope
    • Meade LightBridge Mini 82 Telescope
    • Comparison of Accessories
  • Conclusion

Look for a used telescope

Consider buying a used telescope. You might be able to find a gently used, better quality telescope at a significant discount. Check out local and online classifieds, eBay or Amazon – yes even Amazon sells used and refurbished telescopes.

If your child loses interest in astronomy, you can always use these same avenues to sell a telescope that’s no longer being used to cut your losses.

What is the best telescope for kids?

If you think your child is legitimately serious about astronomy as a hobby or if it’s something you are interested in and plan to share and enjoy together then any of the telescopes recommended in our Best Telescope For Beginners or Best Budget Telescope are perfectly suitable for children and much better quality than the telescopes recommended below. Larger Dobsonian telescopes will obviously require the help of an adult to move and setup.

Nearly all telescopes on tripod mounts under $100 are not very good. This is mainly due to the unstable mounts which result in shaky views, difficulty focusing and poor tracking. A tabletop Dobsonian reflector telescope solves these issues with its sturdy and smooth mount. Tabletop Dobsonians also offer the lowest cost per inch of aperture giving you more light gathering ability than other types of telescopes. They perform better than almost all other telescopes at this price point. But you’re not going to find the perfect telescope or even a really good telescope for under $100.

Most low budget telescopes are not something that will be used for years to come. They’re more of a cheap introduction to astronomy. You can use one to gauge a child’s interest before they either move on to something else or want to upgrade to a better quality and larger aperture telescope.

What can you expect to see?

To be totally honest, have low expectations. Low budget telescopes are not much better than toys. They have small apertures, low quality optics and the accessories are just not very good. The short focal lengths will limit the magnification you’re able to achieve.

Children are mainly interested in viewing the moon and planets. While this is definitely possible with a low budget telescope, the views are underwhelming and not that impressive. You should be able to observe the standard favorite objects for kids including our moon, Jupiter’s cloud bands and 4 moons as well as Saturn’s rings and largest moon Titan. The planets will appear very small, some as tiny points of light.

The moon and planets are unaffected by light pollution, however deep-sky objects will require dark skies and optimal viewing conditions. Deep-sky viewing will be limited to the brighter objects that will still appear faint and fuzzy. Some double stars will be visible.

Do not point the telescope at the sun without a proper solar filter! It’s important that your child understands this and the consequences of damaging their eyes.


Best Reflector Telescope For Kids

Orion SkyScanner 100mm Tabletop Reflector


The Orion SkyScanner 100mm Tabletop Reflector Telescope is a definite step up from the lower budget telescopes. It is a quality entry-level telescope and earns our Best Reflector Telescope For Kids award. Despite being priced at the upper end of the $100 budget, it’s still considered a good value.

The SkyScanner has improved optics over the lower cost telescopes. The almost 4″ (100mm) aperture parabolic primary mirror has 73 percent more light gathering ability than a 76mm aperture mirror. It has a focal length of 400mm and a focal ratio of f/4. The parabolic primary mirror eliminates spherical aberration which results in sharper and clearer images. However, coma is still noticeable around the edge of the field of view.

The Dobsonian base is a simplified altazimuth mount meant to be placed on a table or other sturdy surface. It is solidly constructed and has three rubber feet to reduce vibrations and eliminate wobble. The azimuth and altitude rotations are smooth and the optical tube can be locked into position with the adjustable altitude tension knob. The bottom of the mount has a built-in adapter for attaching the telescope to a camera tripod with a 3/8″ or a 1/4″-20 threaded post. You can also remove the optical tube from the mount and attach it to a compatible altazimuth or equatorial tripod mount with a narrow dovetail saddle, common with most of Orion’s mounts.

The SkyScanner comes with a battery-powered red dot finder, the EZ Finder II, worth about $40 on its own. Red dot finders do not provide any magnification like a finderscope. Looking through the viewing window, align the red dot on the celestial object you want to observe. Once the red dot is centered on the target object, look through the telescope’s eyepiece and it should be in view.

Two 3-element 1.25″ eyepieces are included with the SkyScanner. The 20mm eyepiece provides 20x magnification and the 10mm eyepiece provides 40x magnification. Remember, magnification is calculated by dividing the focal length of the telescope by the focal length of the eyepiece (400mm/20mm = 20x power). Both eyepieces are low power and provide wide fields of view but they are not capable of showing details of the moon and planets. For that you’ll need a short focal length eyepiece like a 3.2mm or 4mm which would provide 125x and 100x magnification, respectively. The SkyScanner performs better than the other low budget telescopes when it comes to viewing deep-sky objects.

The 1.25″ rack and pinion focuser is standard for low cost telescopes. The dual focus knobs make smooth adjustments.

Although the secondary mirror is adjustable, the primary mirror is fixed to the optical tube and cannot be collimated.

As a bonus, the SkyScanner comes with a “special edition” version of its Starry Night astronomy software. It can simulate the sky for different dates, times and locations.

It has a fully assembled weight of only 6.2lbs with a 15.7″ long optical tube. A child should be able to move and operate this tabletop telescope on their own. Even if your child graduates to a larger, better quality telescope, it might be worth keeping the SkyScanner around as a grab-and-go or travel telescope.

  • Parabolic mirror
  • Good value for aperture size vs cost
  • Includes a red dot finder
  • Bottom of mount has built-in tripod adapter
  • Can mount the optical tube to AZ or EQ mounts with dovetail
  • Short focal length
  • Primary mirror is fixed, cannot collimate
  • Need a higher power eyepiece for moon and planets

Buy on Amazon


Best Refractor Telescope For Kids

Meade Infinity 70mm Altazimuth Refractor Telescope


A refractor is what most people picture when thinking of a telescope. If your child has this image of a telescope in their mind then it may be difficult to convince them that a different type of telescope is better.

The Meade Infinity 70mm Altazimuth Refractor Telescope is a decent entry-level telescope to get your child started with astronomy. It is the Best Refractor Telescope For Kids under $100 and is priced midway between the Celestron Cometron FirstScope and SkyScanner. A bonus feature of refractor telescopes is that they also can be used during the day to view birds, wildlife, ships, landscapes and landmarks.

The Infinity 70 has a 2.8″ (70mm) aperture, a focal length of 700mm and an f/10 focal ratio. The aperture is small and the optics aren’t great. The long focal length offers more magnification but a smaller field of view. Chromatic aberration will be noticeable at higher magnifications and appear as color fringing around bright objects.

The tripod is an altazimuth mount constructed from aluminum. As expected with telescopes in this price range, the tripod is lightweight, wobbly and susceptible to vibrations. The height is adjustable from 29″ to 50″. You can track objects with the basic slow motion control rod which moves the telescope in small increments by turning a knob. An accessory tray attaches to the tripod and can hold extra eyepieces.

The battery-powered red dot finder is a must-have for finding the celestial object you wish to observe and orienting your telescope towards it.

Two fully-coated 1.25″ Modified Achromat eyepieces are included. The 26mm eyepiece provides 27x magnification and the 9mm eyepiece provides 78x magnification. The Infinity 70 also comes with a 2x Barlow lens which doubles the magnification of the eyepieces to 54x and 156x. You get a wide range of magnifications (27x, 54x, 78x, and 156x) right out of the box which is more than the other kids telescopes offer. This telescope is better suited for the moon and planets than for deep-sky objects although some binary stars can be observed. You should be able to see Jupiter’s cloud bands and moons, and recognize Saturn’s rings, however the planets will appear very small.

Using the 90 Degree Erect-Prism diagonal will correctly orient the image seen in the eyepiece both horizontally and vertically unlike a reflector telescope where the image appears flipped upside down. One disadvantage is that the prism diagonal reduces the sharpness of the image. The 90 degree diagonal also allows a more comfortable viewing angle especially when the telescope is pointed near the zenith.

The 1.25″ rack and pinion focuser is typical for cheap telescopes. The shaky tripod can give you some difficulty focusing.

The telescope and tripod have a combined weight of only 7.5lbs which should be manageable for older children to move around and setup.

  • Includes a high power and low power eyepiece
  • 2x Barlow lens doubles magnification of each eyepiece
  • Image is correctly oriented with 90 degree erect-prism
  • Accessory tray
  • Smallest aperture
  • Shaky tripod mount
  • Chromatic aberration

Buy on Amazon


Best Lower Budget Telescopes For Kids

When it comes to lower cost telescopes for kids, there are 3 main options. All are tabletop Dobsonian reflectors with similar specs and performance. They each have a focal length of 300mm, a focal ratio of around f/4 and a spherical primary mirror. One is not necessarily better than the others. They all suffer from the same flaws and limitations. The main differences are found in the accessories (finders, eyepieces, tripod adapter and Barlow lens).

Celestron Cometron FirstScope Telescope


The build quality and finish of the Celestron Cometron FirstScope are surprisingly good for a cheap telescope. It has a 76mm (3″) aperture primary mirror and a focal ratio of f/3.95.

As should be expected, the optics of the Cometron FirstScope are not very good. The short focal length and large central obstruction are less than ideal for viewing at higher magnification. The spherical mirror makes it difficult to focus even above 60x magnification due to the resulting spherical aberration. Coma aberration will be present near the edge of the field of view.

The tabletop Dobsonian mount is stable with smooth motions. It swivels 360 degrees, rotates up and down, and has an adjustable tension knob. You will need to place the telescope on a sturdy table or stool in order to provide a comfortable viewing height. The rubber feet provide better surface grip and reduce vibrations.

Setting up the telescope is quick and easy as no tools are required. The optical tube comes preassembled to the mount. All you need to do is remove the dust caps, attach the finderscope and insert an eyepiece into the focuser.

There are actually two versions of the Celestron FirstScope that are roughly the same price. The FirstScope has a white mount and a black optical tube showing the names of famous astronomers and scientists. The Cometron FirstScope has a black mount and a white optical tube. Besides these styling differences, the Cometron version comes with a 5×24 finderscope. The FirstScope does not include any finder and should be avoided for this reason. While a 5×24 finderscope is not great, having a finder is better than nothing at all making it easier locate celestial objects and point the telescope in their direction. The numbers 5×24 indicate that the finderscope has 5x magnification and a 24mm aperture.

The Cometron FirstScope comes with two 1.25″ Kellner eyepieces: a 10mm (30x magnification) with a 1.5° field of view and a 20mm (15x magnification) with a 3° field of view. The included eyepieces are low power and not really that great for planets but do offer a wide field of view. It is possible to view brighter deep-sky objects like Orion nebula. Buying an additional eyepiece with higher power for more lunar and planetary detail would cost almost the same as the telescope. That money would be better spent on buying a better telescope. It should also be mentioned that the eyepieces included with the Cometron FirstScope are better quality than the FirstScope’s eyepieces.

At f/3.95, the Cometron FirstScope is considered to have fast focal ratio. This means that the light entering the telescope has a steep angle and even the smallest turns of the focuser knobs can cause the image to lose focus. The 1.25″ rack and pinion focuser does not hold focus very well under the weight of the eyepiece. As mentioned previously, the telescope’s limitations make focusing difficult even at medium power. The focuser does come with a dust cap which is nice to have.

Collimation is not possible as the primary mirror is fixed to the optical tube and cannot be adjusted.

The Cometron FirstScope is extremely portable weighing only 4.3lbs with a 10″ long optical tube. It should be no problem for a child to handle on their own. Even if you’re not a kid, its small size and weight make it ideal to use as a grab-and-go or travel telescope to take in the car on a road trip or to go camping.

  • Wide field of view
  • Lowest cost
  • Extremely portable
  • Includes a finderscope
  • Spherical mirror, aberrations
  • Short focal length
  • Difficulty focusing
  • Primary mirror is fixed, cannot collimate
  • Need a higher power eyepiece for moon and planets

Buy on Amazon


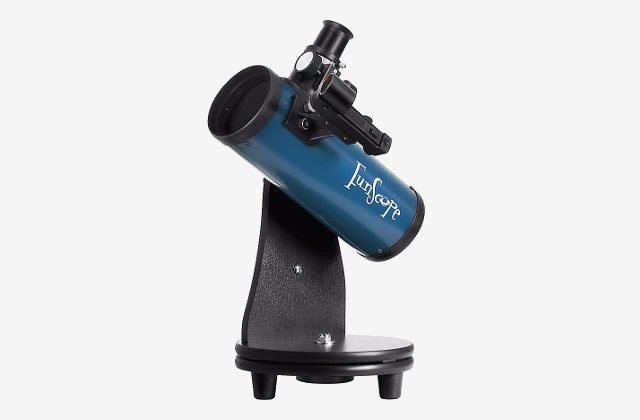
Orion FunScope 76mm Tabletop Reflector Telescope


The Orion FunScope 76mm Tabletop Reflector Telescope is nearly identical to the Cometron FirstScope in terms of specs, build quality and finish but it’s slightly more expensive. It too has a 76mm (3″) aperture primary mirror and a focal ratio of f/3.95. There are some minor differences with the finder and mount.

The FunScope performs similar to the Cometron FirstScope and also suffers from optical issues due to the short focal length and spherical primary mirror. Achieving focus at medium and high power can be difficult. Coma aberration will be noticeable around the edge of the field of view. On the positive side, a short focal length also means a wide field of view which allows you to see more of the sky. This makes it easier to find and track celestial objects.

The tabletop Dobsonian mount is solid and sturdy with smooth movements. It uses a single-arm to hold the optical tube and an adjustable tension knob controls the up and down motion. The base of the mount includes a tripod adapter which is a nice feature not included with the Cometron FirstScope. The adapter allows you to mount the telescope onto a camera tripod if you are not near a table. Make sure to use a heavy duty tripod to avoid vibrations. The mount and optical tube are already assembled in the box. To complete the setup, attach the finder using thumb screws and insert an eyepiece. The optical tube and focuser also come with dust caps.

The FunScope comes with a red dot finder to help you accurately aim the telescope at objects in the sky. The EZ Finder II is a battery-powered red dot reflex sight with zero power (no magnification). It costs about $40 if purchased separately.

The FunScope includes a 10mm 1.25″ eyepiece (30x magnification) and a 20mm 1.25″ eyepiece (15x magnification). They are decent 3-element fully coated eyepieces. The eyepieces are good for low power, wide field viewing but not the best for viewing any details of the moon and planets. You may want to consider purchasing a Barlow lens or a short focal length eyepiece for high power views. Keep in mind that these extras will add to the cost of the telescope which could have been spent on a better quality telescope instead.

The rack and pinion focuser accepts 1.25″ eyepieces. The steep light cone from the fast focal ratio causes the focuser to be very sensitive, losing focus with even minor adjustment of the focus knobs.

You will not be able to collimate this telescope as the primary mirror is glued to the optical tube.

As a bonus, Orion has included a Moon Map which names and describes over 260 features on the moon including various craters and mountains.

Weighing only 4lbs, the FunScope is extremely portable. It shouldn’t take up much room in your car if you are planning to take it on a trip or go camping.

  • Wide field of view
  • Includes a red dot finder
  • Extremely portable
  • Mount has a built-in tripod adapter
  • Bonus Moon Map
  • Spherical mirror, aberrations
  • Short focal length
  • Difficulty focusing
  • Primary mirror is fixed, cannot collimate
  • Need a higher power eyepiece for moon and planets

Buy on Amazon


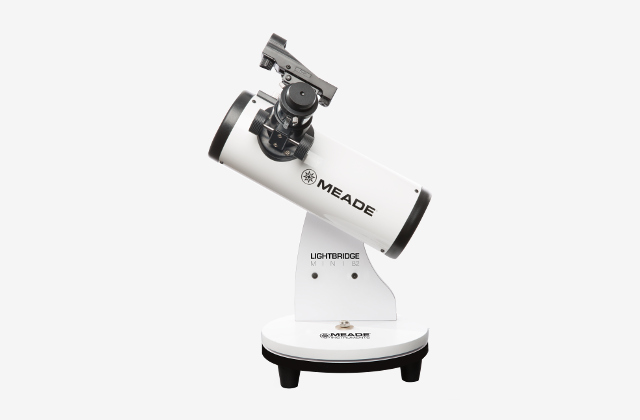
Meade LightBridge Mini 82 Telescope


The Meade Instruments LightBridge Mini 82 Telescope is the smallest telescope in Meade’s lineup of tabletop Dobsonians. The largest of which, the LightBridge Mini 130, is one of our recommended Best Budget Telescopes. The LB Mini 82 is well-built and the all white design looks good. It has a slightly larger 3.2″ (82mm) aperture primary mirror and a slightly faster f/3.7 focal ratio than the Cometron FirstScope and FunScope.

Like the other lower budget telescopes, the LB Mini 82 also has a spherical mirror and the optical performance is not much different. Comatic and spherical aberrations will be present, affecting the quality of the views and the ability to focus especially at higher magnifications.

The tabletop Dobsonian mount is made of particleboard. It operates like a see-saw on a lazy susan, moving up and down, and rotating 360 degrees. The bottom of the mount has rubber feet to improve grip and stability. A large adjustable knob controls the friction of the altitude motion and can lock the optical tube in place.

A standard red dot reflex sight is included as the telescope’s finder and is mounted on the top of the optical tube.

The two eyepieces that come with the LB Mini 82 are a 26mm that gives 12x magnification and a 9mm that gives 33x magnification. The addition of a 2x Barlow lens is a welcome bonus not included with the other lower budget scopes. The Barlow doubles the magnification of each eyepiece giving you 4 different powers (12x, 24x, 33x, 66x) with only 2 eyepieces. Despite the added magnifications from the Barlow, a higher power eyepiece would still be necessary to view greater details of the moon and planets.

The 1.25″ rack and pinion focuser has large dual focusing knobs. The f/3.7 focal ratio is the fastest of the lower budget telescopes and results in a steeper angle of light entering the telescope. This makes precise focusing more difficult as a minor turn of the adjustment knobs can quickly knock the image out of focus.

The LB Mini 82 is the lightest of the low budget options weighing in at a mere 3.8lbs. Even young children should be able to manage moving it with no issues. It’s small enough to fit on a bookshelf and would make a nice display piece.

  • Lowest cost
  • Extremely portable
  • Includes a red dot finder
  • 2x Barlow lens doubles magnification of each eyepiece
  • Spherical mirror, aberrations
  • Short focal length
  • Difficulty focusing
  • Primary mirror is fixed, cannot collimate
  • Need a higher power eyepiece for moon and planets

Buy on Amazon


Comparison of Accessories

 Celestron Cometron FirstScopeOrion FunScope 76mmMeade LightBridge Mini 82
Finder5x24 finderscopered dot finderred dot finder
Eyepieces20mm KE - 1.25"
10mm KE - 1.25"
20mm - 1.25”
10mm - 1.25”
26mm - 1.25"
9mm - 1.25"
Barlow LensNoNoYes
Focuser1.25" rack & pinion1.25” rack & pinion1.25" rack & pinion
Tripod AdapterNoYesNo

Conclusion

If your only willing to spend $100 or less on a telescope for your child, buying one with the largest aperture for your money and a sturdy mount will give them the best opportunity to explore the night sky. A tabletop Dobsonian telescope should give you the most value and meet this criteria.

The Orion SkyScanner 100mm Tabletop Reflector Telescope is our best overall telescope for kids. It provides a solid mount and the largest aperture with better optics than the lower budget telescopes. If your child has their heart set on a refractor style telescope, the Meade Infinity 70mm Altazimuth Refractor Telescope is good option that provides 4 different powers for viewing and can be used during the day to view objects on land. The Celestron Cometron FirstScope Telescope, Orion FunScope 76mm Tabletop Reflector Telescope, and Meade LightBridge Mini 82 Telescope are close in price and performance with similar specs. If you prefer the finderscope, go with the Cometron FirstScope. If you like the red dot finder and bonus Moon Map or if you want to mount the telescope on a tripod, buy the FunScope. If you’re not interested in buying an additional eyepiece, the Barlow lens included with the LightBridge Mini 82 will provide a wider range of magnifications.

While none of these telescopes are perfect, they should be enough to give your child a decent introduction to telescopes and astronomy.

Total Solar Eclipse 2017

Last updated: July 6, 2017

Photo by Damien Deltenre

Something strange will happen on Monday August 21, 2017. Daylight will turn into darkness, temperatures will drop, the sound of crickets will replace birds chirping, and millions of people will be staring up at the sky. For the first time in 99 years, a total solar eclipse will sweep across the entire United States along a narrow corridor from Oregon to South Carolina. The “Great American Eclipse” will be one of the most beautiful natural phenomena you can experience.

The last total solar eclipse in the United States occurred in 1979 and was only visible from states in the northwest corner of the country (Washington, Oregon, Idaho, Montana, and North Dakota).

What is a total solar eclipse?

Photo by: Renata3

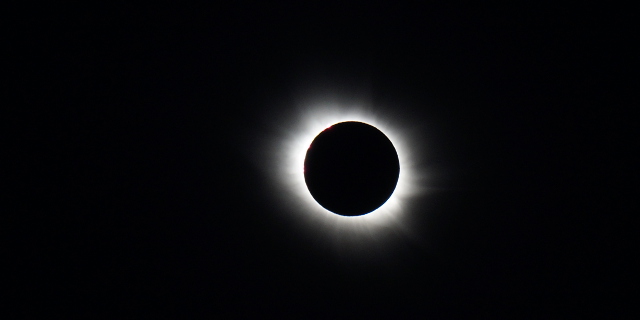
A total solar eclipse occurs when the moon completely blocks out the sun. As the moon passes between the Earth and sun, it casts two types of shadows on the Earth. The umbra is the moon’s innermost and darkest shadow. If you’re in the path of the moon’s umbral shadow you will see the sun’s entire disk obscured and the glowing appearance of the sun’s corona, its outer atmosphere. This phase of the eclipse is called totality. The narrow track of the umbra moving across the U.S. is known as the path of totality and will be only 71 miles at its widest point.

The penumbra is the moon’s faint outer shadow. If you’re within the moon’s penumbral shadow, you will see a partial solar eclipse. The penumbra covers a much larger area on Earth allowing the partial eclipse to be visible throughout North America including Canada as well as the northern part of South America, and the western parts of Europe and Africa.

A total solar eclipse occurs somewhere on Earth about once every 18 months. This may sound like a more common occurrence than one would think but due to the narrow path of totality, the odds of viewing a total solar eclipse from a particular location on Earth are rare.

There are other types of solar eclipses but nothing compares to a total solar eclipse. An annular solar eclipse occurs when the Earth, moon and sun are properly aligned but the moon is too far away from Earth due to its elliptical orbit. The moon’s smaller apparent size is unable to completely cover the sun and it appears as a very bright ring. If the alignment of the Earth, moon and sun is off slightly, only a portion of the sun’s disk will be covered by the moon. This is a partial solar eclipse and it is not nearly as dramatic or spectacular as witnessing totality even if it covers 99 percent of the sun.

What you will see during a total solar eclipse

Several notable events occur just prior to totality. As the moon almost completely covers the sun, beads of light appear along the edge of the moon as sunlight shines through the lunar mountains, valleys and craters. This effect is known as Baily’s Beads. When only a single large bead of light is visible, it takes on the appearance of a shining diamond ring.

Once totality is reached, the sun’s normally hidden corona becomes visible. The corona is an aura of plasma that is millions of degrees hotter than the surface of the sun and extends millions of miles into space. Witnessing the corona is a profoundly intense experience that is simply beyond words.

As the sky grows dark, the blue skies began to dull and turn deeper blue to twilight blue to blue-black. The darkened skies allow the brighter stars and planets to become visible including Venus and Jupiter. Looking to the horizon you’ll see orange and yellow twilight in all directions. You’re actually seeing light from beyond the umbral shadow in areas where the eclipse is not in totality.

How long totality will last varies depending on your location and how close you are to the center of the umbra. The longest duration of totality will be 2 minutes and 40 seconds.

Where to see the total solar eclipse

The “Great American Eclipse” will first appear in Oregon and cross Idaho, Wyoming, Nebraska, Kansas, Missouri, Illinois, Kentucky, Tennessee, Georgia, North Carolina and South Carolina. Very tiny corners of Montana and Iowa are also just inside the path of totality.

NASA’s Total Solar Eclipse Interactive Map plots the path of totality on Google Maps. Zoom in and click anywhere on the map to see the start and end times, duration, and magnitude of the solar eclipse at a specific location.

A large portion of the U.S. will be within a day’s drive of seeing the total solar eclipse. Several cities and towns have been preparing for this day for several years. Millions of people are expected to witness this event and populations are anticipated to at least double in some locations. Many hotels along the path of totality have been booked for over a year in advance. Expect major traffic getting to and leaving your viewing site.

The best locations to view the longest duration of totality are in Missouri, Illinois and Kentucky along the middle of the path of totality. Just outside of Carbondale, Illinois will be the point of Greatest Duration and an area near Hopkinsville, Kentucky will be the point of Greatest Eclipse. Both are expected to see up to 100,000 visitors. Hopkinsville has been promoting itself as “Eclipseville”.

How to safely view the total solar eclipse

Never look directly at the sun without proper eye protection. You can severely damage your eyes and go blind. Even staring at 1 percent of the sun (a 99 percent partial eclipse) or Baily’s Beads is enough to damage your eyes. Sunglasses are not a sufficient or acceptable form of eye protection, not even wearing two pairs.

Direct observation of the sun during a total solar eclipse can be done safely if using a certified solar filter that meets ISO Standard 12312-2. A solar filter will protect your eyes from the sun’s ultraviolet and infrared radiation, and intense visible light. Certified solar filters can be found in glasses, goggles and hand-held solar shields or viewers. Low cost solar eclipse glasses with cardboard frames can be purchased in packs of 5 or 10. More durable plastic frame versions are also available.

Always inspect your solar filter before use. If it is has a tiny hole, is scratched or damaged in any way, throw it in the trash. Make sure to put your glasses on first before before looking up at the sun. Only once the moon has completely covered the sun is it safe to remove your glasses and view the total eclipse with the naked eye. The instant the sun reappears, immediately return to your solar eclipse glasses or solar viewer to watch the end of the eclipse. At some locations, a person may make an announcement or blow a whistle to indicate when to remove your glasses and when to put them back on.

An alternative form of eye protection is number 14 welding glass, the only shade dark enough for solar viewing. Welding glass of an unknown or lower number is not safe to use. Stacking different numbers of welding glass together does not provide the same protection as number 14 welding glass.

If you choose to watch the eclipse through a telescope or binoculars, or want to take photos with a camera, you must have a proper solar filter attached to the end optical device or you can permanently damage your eyes. Do not use a solar filter that attaches to the eyepiece.

Another method to view the partial solar eclipse phase is indirectly with a pinhole camera. You can make a simple pinhole camera to project the image of the sun onto a surface and watch the changing crescent shape of the sun. Poke a pinhole through the center of one piece of white cardboard. With your back to the sun, allow the sunlight to shine through the pinhole onto a second piece of white cardboard held in front of you. The projected image will be upside down. Moving the two pieces of cardboard further away from each other will enlarge the image. Moving them closer together will brighten the image. Do not look at the sun through the pinhole.

When is the next total solar eclipse?

If you miss this year’s solar eclipse, the next total solar eclipse visible from the United States will occur on April 8, 2024. The path of totality will travel from Texas to Maine with a much longer duration of totality, almost 4.5 minutes.

Be warned, many people who witness a total solar eclipse for the first time become addicted and start to plan trips around the timing of the next solar eclipse. These passionate eclipse chasers will plan years in advance and are willing to go anywhere in the world just to catch another glimpse of totality.

  • Go to page 1
  • Go to page 2
  • Go to Next Page »

Primary Sidebar

Meade Infinity 102mm AZ Refractor Telescope Review

Orion SkyQuest XT6 Classic Dobsonian Telescope Review

Orion StarBlast 6 Astro Reflector Telescope Review

Best Telescopes for Kids

Best Budget Telescope

Best Telescope For Beginners

Best Astronomy Books For Beginners

Copyright © 2023 · TelescopeAdviser.com

Privacy Policy · Affiliate Disclosure · Contact Us